MultiMC
We recommend using the CurseForge and FTBApp launchers until further notice, due to changes regarding downloads of modpacks in third party launchers with CurseForge and FTB.
About MultiMC
MultiMC is a Minecraft launcher. It can be used to launch vanilla Minecraft, custom modpacks, or regular modpacks. The launcher is very good for Linux users or those who don’t like the Twitch Launcher. We strongly recommend this launcher.
How to Install
Please note that you should not attempt to run the program from within the zip file. You will need to extract it first.
- Head to MultiMC and select which software is most appropriate for you.
- Locate the downloaded zip file and extract it into a folder.
- On most machines, you can right-click the folder, click extract files and select your destination. If your machine does not have this option, head to Google!
- As an example on Windows 10 you can right-click and select “Extract All..” and select a destination to extract the files to.
- We recommend only using the systems built in tools to extract compressed files.
- It’s typically best to install MultiMC into the root of your drive on Windows. For example C:\MultiMC - this is to prevent file name length issues.
- Open the MultiMC folder generated at the location specified during extract and double-click the MultiMC executable.
- Complete the final setup details that it asks for, such as your preferred language and java version.
Login to your Profile
- Click Profiles at the top
- Click Manage Accounts in the dropdown
- Click Add on the right side and fill out the request information
Allocate More Ram
This must be done before setting up an instance
- Click the settings, found at the top of your toolbar
- Head to Java on the left side
- Under the memory section you will be able to change your minimum and maximum allocation
- We do not suggest going above 8192mb
- 6144mb is the average selection for 1.12+
Setup an Instance
With Link
- Copy the link address from the modpack download page
- In MultiMC, select the white blank paper at the top that says Add Instance
- Check the box next to Import Modpack (local file or link)
- Paste your link into the text box below
- Enter the name of the modpack
- Click on the instance and launch
To update you must reinstall the new update in the same manor as you downloaded the pack oringinally. Remember to save any world files for single player worlds.
With Zip
- Download a zip file of the modpack from the modpack download page
- In MultiMC, select the white blank paper at the top that says Add Instance
- Check the box next to Import Modpack (local file or link)
- Click the 3 dots and locate your zip
- Once located, click ok
- Launch and enjoy
Archive Cannot find instance.cfg
Ensure that you are running a version higher than or equal to 0.6.0. You can find your version at the top of the launcher toolbar. If your version is not higher than or equal to 0.6.0, follow this tutorial
Adding Java Arguments
Some packs have Java Arguments (args) that we recommend you the pack with. Check the ModPack Tips section for any args that might need to be set for your pack. The below assumes you’re setting it per instance.
- Locate the Settings tab at the top of the toolbar
- Click Java on the left side
- Locate JVM Arguments in the Java Runtime section
- Fill in your desired arguments in the blank
- Click test to verify everything is working properly.
Updating Java Per Instance
Make sure you read up on how to backup your modpack. Before editing these settings!
Simply follow these steps to update your Java version per instance with MultiMC. Please note that some parts of the instructions will vary based on your system and installation methods.
- With MultiMC launched, and no Modpacks started, right click on one of your Minecraft installs (instances) and select “Edit Instance”
- Click on “Settings” on the left hand side and you should see a menu like this.
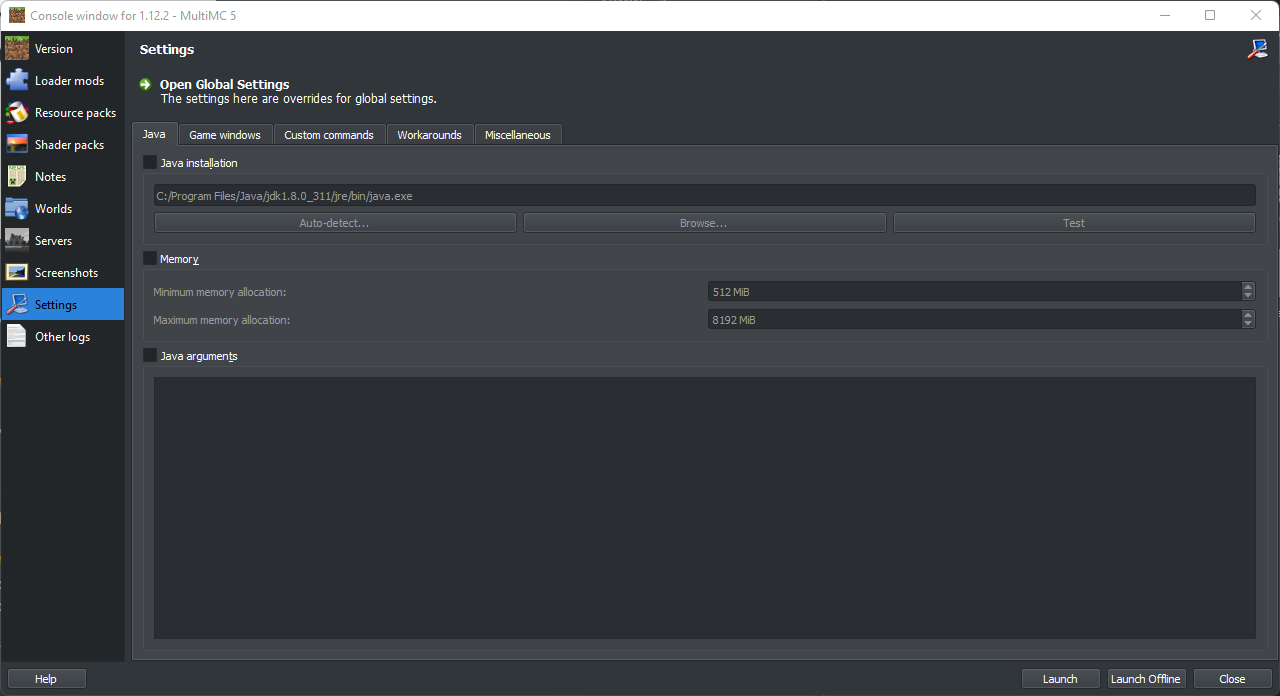
- On this screen you’ll see a checkbox at the top labeled “Java installation”. Check the box and then click “Browse..”
- From here you’ll have to navigate to the location that Java was installed on your computer for the correct version.
- For Windows these are typically located under
C:\Program Files\Javaunless you opted to install it else where. You will need the full path of the java.exe file. - You will need to open the related version eg jre1.8.0_211 and then click
binbefore selecting the Java executable. On Windows this will be namedjava.exe- On an example Windows system this is installed at
C:\Program Files\Java\jre1.8.0_211\bin\java.exe
- On an example Windows system this is installed at
- For Windows these are typically located under
Managing Mods With MultiMC
Removing and adding mods can cause pack instability. Please consult your launcher’s documentation on backing up your instance prior to preforming any of the tips below.
Using MultiMC is by far the easiest and simplest method for updating and managing your mods.
Below is an example of how to remove/disable a mod with MultiMC. In the below example we will be removing FTB Auxilium.
`
- Right Click on the modpack and select
Edit Instancefrom the menu that pops up. - On the left hand of the window you will see a list of icons and options. Click
Loader Mods.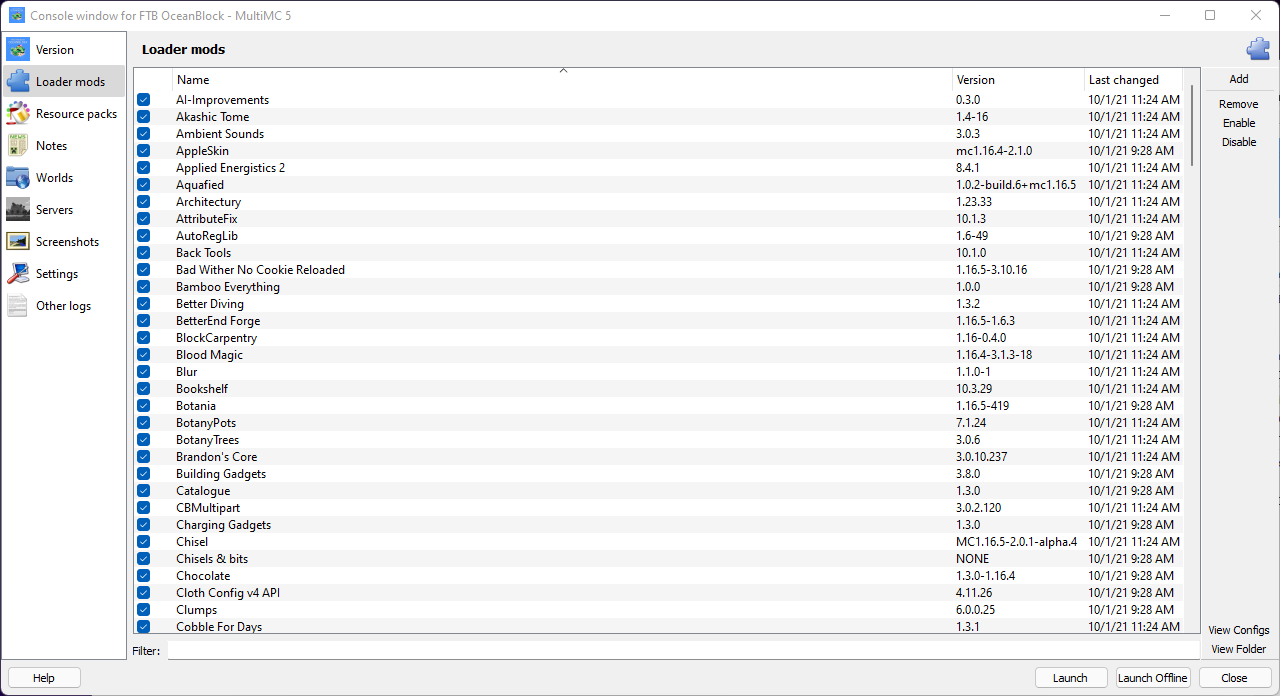
- At the bottom of this new section there’s a text box that is labeled filter type in the first part of name of the mod you wish to disable. For example to disable FTB Auxiium you would type in
FTB. You should then see only one mod listed. Uncheck the check box for this mod.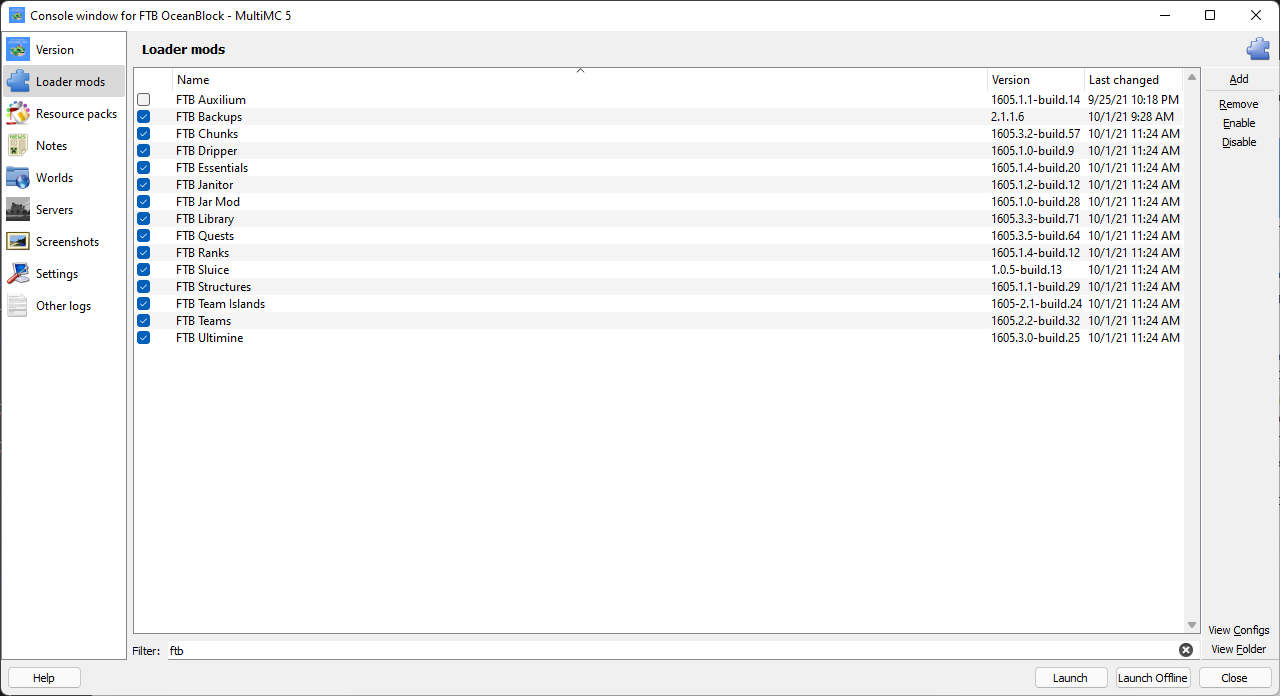
- Repeat for any other mods you neeed to remove.
- Click “Close” when done.
- Launch your modpack to play.
Backing up your modpacks
If you’re wanting to modify the mods in your pack it’s highly recommend you backup your instance first. This prevents you from having to do a completely clean reinstall.
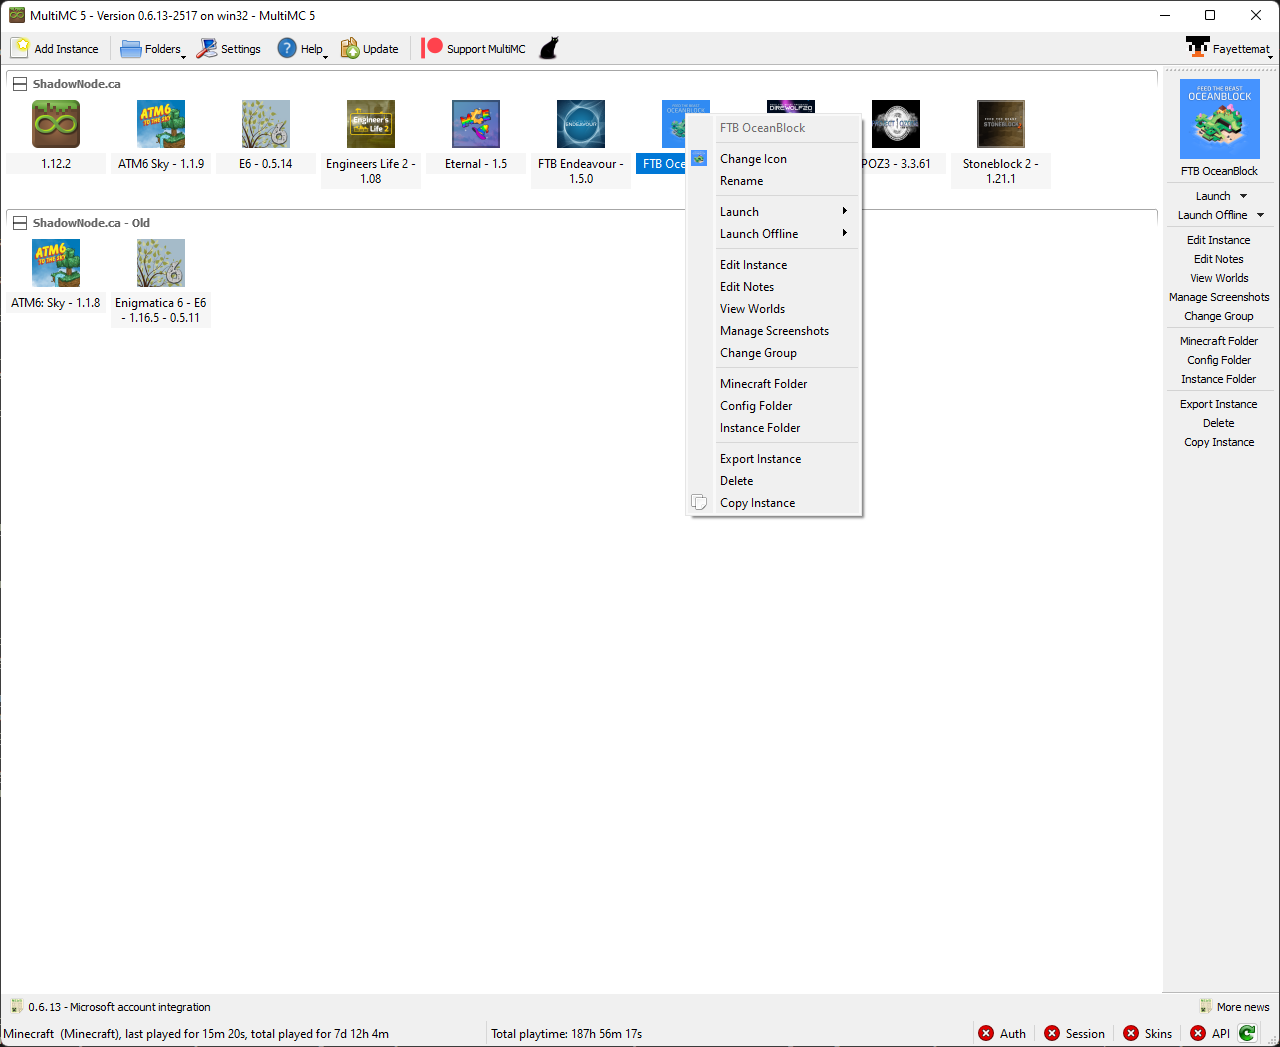
- Select your modpack and right click it. Select copy instance.
- Type a new name for the copied modpack in and click ok. Optionally you can also copy your saves and keep your play time. This is great if you want to try out a mod or two that you have a feeling will break your pack.
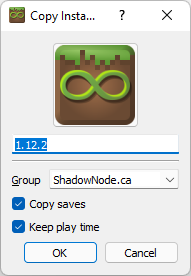
- You will now have a duplicate modpack ready for backup purposes.